Campaigns Overview
What Are Campaigns?
Campaigns in Conference Hero let you send multi-step email sequences to targeted groups of leads. Whether you're inviting attendees to a pre-conference webinar, following up after a booth visit, or nurturing post-conference leads, campaigns automate the entire outreach process.
Campaign Types
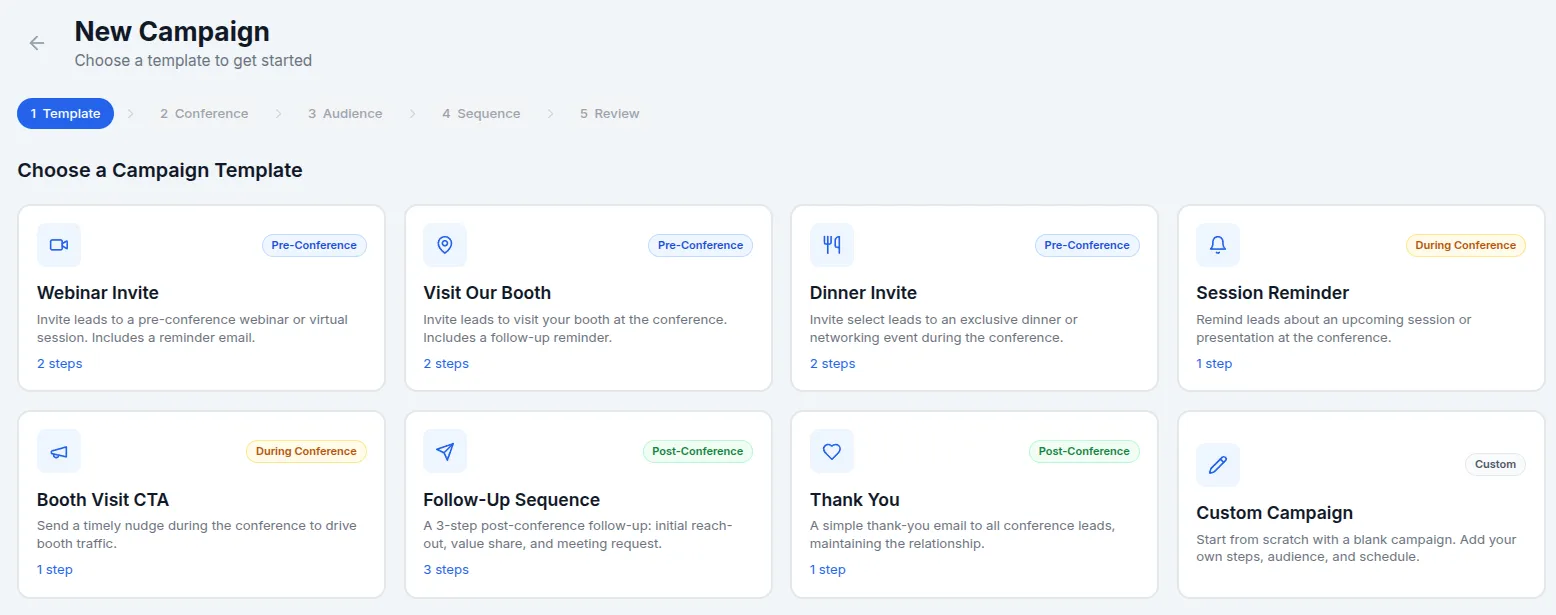
Conference Hero includes 8 guided campaign templates organized by conference phase:
Pre-Conference
Webinar Invite — 2-step sequence: invitation + reminder
Visit Our Booth — 2-step sequence: invite to visit + "see you there" follow-up
Dinner Invite — 2-step sequence: invitation + RSVP reminder
During Conference
Session Reminder — Single email reminder about an upcoming session
Booth Visit CTA — Single email encouraging a booth stop
Post-Conference
Follow-Up — 3-step sequence: initial follow-up → value-add content → meeting request
Thank You — Single thank-you email
You can also start with a Custom blank campaign and build your own sequence from scratch.
Creating a Campaign
Navigate to Campaigns in the sidebar and click New Campaign. The campaign builder walks you through five steps:
Step 1: Choose a Template
Select a guided template or start blank. Each template pre-fills the email steps with suggested subject lines, body copy, and timing.
Step 2: Select Conference
Pick the conference this campaign targets, or choose Cross-conference to reach leads across multiple conferences.
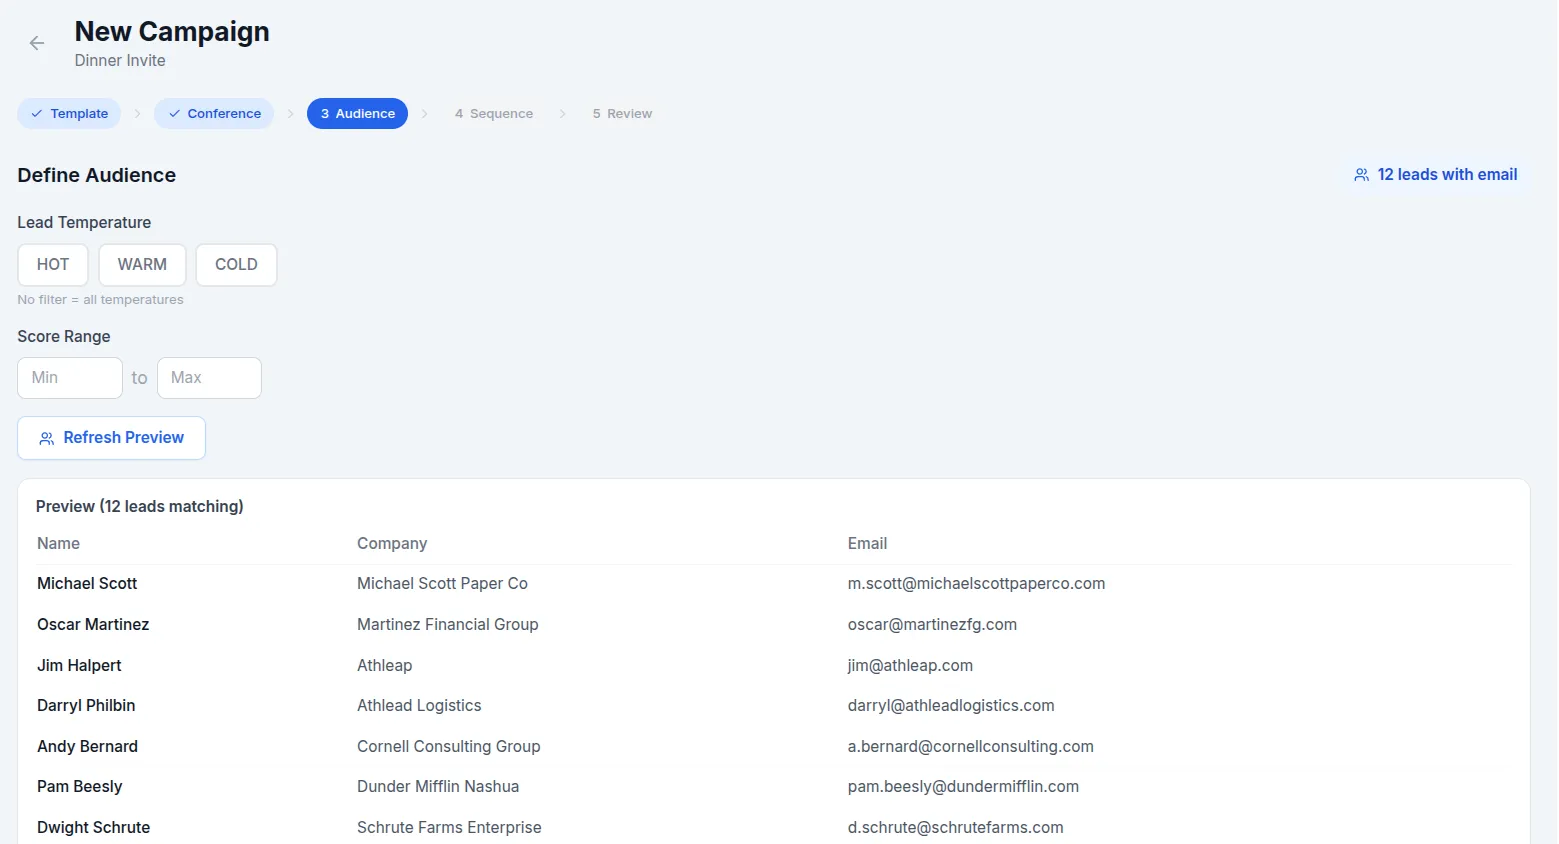
Step 3: Define Your Audience
Filter which leads receive the campaign using:
Temperature — Hot, Warm, Cold (select one or more)
Score range — Minimum and maximum lead scores
Category — Lead categories you've defined
A live preview shows up to 25 matching leads with their name, company, and email. Leads without a valid email address appear greyed out with a warning icon — they are automatically excluded from the campaign.
Step 4: Build Your Sequence
Each campaign consists of one or more email steps. For each step you configure:
Subject line — The email subject
Body — Rich text email content using the built-in editor
Timing — When the email sends. Use preset delays (Immediately, 1 hour, 1 day, 2 days, 3 days, 7 days), pick a specific date/time, or enter a custom delay
Click the Insert variable buttons above the editor to add personalization tokens at your cursor position:
{{firstName}}— Lead's first name{{lastName}}— Lead's last name{{company}}— Lead's company{{conferenceName}}— Conference name{{senderName}}— Your name (the sender)

Step 5: Review & Launch
Review the campaign summary including name, conference, audience count, sequence steps and timing, and the sender identity. Choose a sender from your workspace members — emails are sent as "Your Name via Conference Hero" with replies directed to the sender's email address.
You can:
Save as Draft — Save for later editing
Activate Now — Start the campaign immediately
Schedule — Set a future start date/time
Campaign Lifecycle
Campaigns move through these statuses:
Draft — Being edited, not yet sending
Scheduled — Will activate at the scheduled date/time
Active — Currently sending emails on the configured schedule
Paused — Temporarily stopped; can be resumed
Completed — All recipients have received all steps
Cancelled — Permanently stopped
Monitoring Campaigns
Click any campaign to view its detail page, which shows:
Stats bar — Recipients, Sent, Pending, and Failed counts
Sequence timeline — Visual step-by-step view with send counts per step
Recipients table — Each lead's current step, status, last sent timestamp, and next scheduled send
From the detail page you can Pause, Resume, or Cancel active campaigns.
Sending a Quick 1:1 Email
For individual outreach outside of a campaign, open any lead and click Send Email. This opens a compose window where you can write and send a one-off email directly to that lead.
Related: Email Drafts · Auto-Send Rules · Email Templates & Editor